Add TopTechs as a preferred source
The fastest way to screen record on a Mac is the built-in Screenshot toolbar: press Shift + Command + 5, choose to record the whole screen or a selected portion, then click Record. To stop, click the ⏹ stop button in the menu bar (or press Command + Control + Esc). No downloads needed — every modern Mac can screen record out of the box, with or without audio. This guide covers all the ways to record your screen on macOS, how to capture sound, where recordings save, and how to fix common problems.
Quick answer: Press Shift + Command + 5 → pick Record Entire Screen or Record Selected Portion → click Options to add your microphone → click Record. Stop from the menu-bar ⏹ icon. Recordings save to your Desktop as a
.movfile by default.
Using a PC as well? We have a companion guide on how to screen record on Windows with audio — the built-in tools are different, but just as capable.
What you'll need
- Any Mac running macOS Mojave (2018) or later — that's when the Shift + Command + 5 toolbar arrived. Older Macs can still use QuickTime Player.
- Nothing to install for screen + microphone recording.
- For internal (system) audio — e.g. recording sound from a video or app — you'll need macOS Sequoia's newer capture options or a free audio tool (explained below).
Method 1: Screen record on Mac with Shift + Command + 5 (easiest)
The Screenshot toolbar is the quickest built-in way to record your screen on a Mac. Press Shift + Command + 5 to open it, choose a recording mode, set your options, and hit Record.
- Press Shift + Command + 5. A control bar appears at the bottom of the screen.
- Choose Record Entire Screen or Record Selected Portion (drag to size the box).
- Click Options to choose where the file saves, set a start timer, and — importantly — turn on your microphone if you want to narrate.
- Click Record. Do whatever you want to capture.
- To stop, click the ⏹ stop icon in the menu bar, or press Command + Control + Esc.
- A thumbnail appears in the corner — click it to trim or share, or ignore it to save automatically.
This method is best for quick recordings, tutorials and bug reports. It records at your screen's resolution and saves an MP4-style .mov file.
Method 2: Screen record with QuickTime Player
QuickTime Player offers the same screen recording on older Macs and adds a few sharing options. It's a good alternative if the keyboard shortcut isn't available.
- Open QuickTime Player (from Applications or Spotlight).
- In the menu bar, click File → New Screen Recording.
- The same Shift + Command + 5 controls appear; choose full screen or a portion.
- Click the Options arrow to pick a microphone, then click Record.
- Click the menu-bar ⏹ to stop, then File → Save to name and store your video.
How to screen record on Mac with sound
There are two kinds of audio, and Macs treat them differently. Here's how to capture each:
- Your voice (microphone): easy. In the Shift + Command + 5 toolbar, click Options and select your mic under "Microphone." Everything you say is recorded alongside the screen.
- Internal / system audio (sound from the Mac itself): older macOS versions can't record this natively. On macOS Sequoia and later, some apps and the updated capture tools can include app audio. On older Macs, install a free virtual audio driver like BlackHole or use an app such as OBS Studio to route system sound into the recording.
Tip: to record a video call or a YouTube clip with its sound on an older Mac, BlackHole (free, open source) is the most reliable no-cost option.
Where do Mac screen recordings save?
By default, screen recordings save to your Desktop with a name like "Screen Recording 2026-07-29 at 10.30.mov." To change this, open the Shift + Command + 5 toolbar, click Options, and pick a new location under "Save to" (Documents, Clipboard, Mail, or a custom folder). Recordings are .mov files that play in QuickTime and upload to most platforms directly.
How to trim or edit your recording
You don't need extra software for basic edits:
- Open the recording in QuickTime Player.
- Choose Edit → Trim (or press Command + T).
- Drag the yellow handles to keep only the part you want, then click Trim and save.
For titles, zooms or cuts, use the free iMovie app (built into macOS) or a dedicated editor.
Troubleshooting: common screen-recording problems
- No sound in the recording: you didn't enable the mic in Options, or you're trying to capture system audio without a tool like BlackHole.
- Black screen when recording a streaming app: DRM-protected services (Netflix, Apple TV+) intentionally block screen recording — this is expected.
- Shortcut does nothing: check System Settings → Keyboard → Keyboard Shortcuts → Screenshots, and make sure Screen Recording is allowed under Privacy & Security → Screen Recording.
- Recording is laggy: close heavy apps, and record a selected portion instead of the whole screen on older Macs.
Frequently asked questions
How do I screen record on a Mac?
Press Shift + Command + 5 to open the Screenshot toolbar, choose Record Entire Screen or Record Selected Portion, click Options to add your microphone if needed, then click Record. Stop by clicking the ⏹ icon in the menu bar. The video saves to your Desktop as a .mov file by default.
How do I screen record on Mac with audio?
For your voice, open Shift + Command + 5, click Options, and select your microphone before recording. For internal system audio (sound from apps or videos), use macOS Sequoia's app-audio capture where available, or install a free virtual audio driver like BlackHole, since older macOS versions can't record system sound natively.
Where are Mac screen recordings saved?
By default, screen recordings save to your Desktop as a .mov file named with the date and time. You can change the location in the Shift + Command + 5 toolbar under Options → Save to, choosing Documents, a custom folder, the Clipboard, or Mail.
Is there a time limit for screen recording on Mac?
No, macOS doesn't impose a fixed time limit on screen recordings. The only practical limits are your available storage and battery. Long recordings create large files, so keep an eye on free disk space for lengthy sessions.
The bottom line
You don't need any extra software to screen record on a Mac: Shift + Command + 5 handles almost everything, QuickTime Player is a solid backup, and a free tool like BlackHole covers internal audio on older machines. Add your microphone in Options, stop from the menu bar, and trim in QuickTime — that's all it takes.
Want more Mac and PC tips? Browse our how-to guides, or if you're shopping for a machine, see the best gaming laptops and best laptops for students.
The upgrade that matters most: your microphone
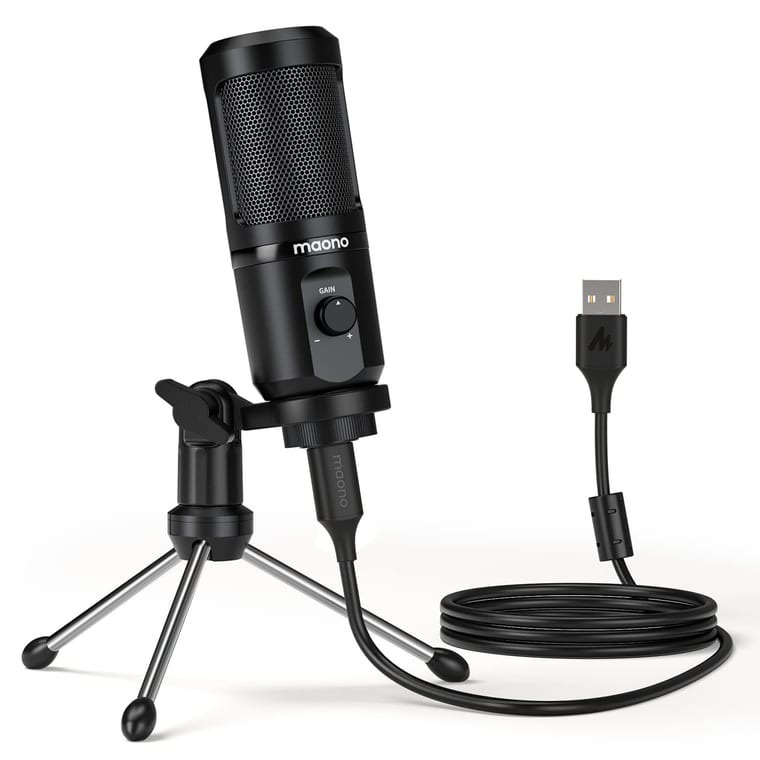
QuickTime and ScreenFlow are only as good as the audio you feed them. A cheap USB mic is the biggest single improvement you can make:
- Maono AU-PM461TR USB condenser microphone — connects straight over USB, is recognised by macOS with no drivers, and removes the room echo that built-in mics pick up.
More screen tricks: see how to cast your laptop to a TV to put those recordings on the big screen.